Your Guide to Growing Corn in the PNW
May 15 2023

Learn About Growing & Harvesting Corn with Maria Bertucci

|
Types of Corn:
Corn is an ancient staple food that originated in South America. It has been extensively bred and selected to become the juicy super-sweet kernels we are used to today; but there are also many truly ancient heirloom varieties still being preserved and grown by collectors all over the United States.
Most of the Native American varieties are flint or dent corn, meant to be dried, stored and ground into flour over the lean months of winter. Many of these corn varieties are truly beautiful, try looking up “Hopi Purple” or “Montana Cudu” varieties. My favorite of these flour corn varieties to grow is “Painted Mountain” because it is so richly colored and glossy–each ear is unique and it can be dried and ground into a fresh tasting cornmeal for baking. Kids love opening each ear in the fall, revealing the bright colors and hanging the ears to dry.
Another fun type to try with kids is popcorn—again these varieties are often beautifully colored and smaller than sweet corn. They are first dried, then the kernels removed from the ear and popped in a hot pan with a lid over medium high heat with a little coconut oil.
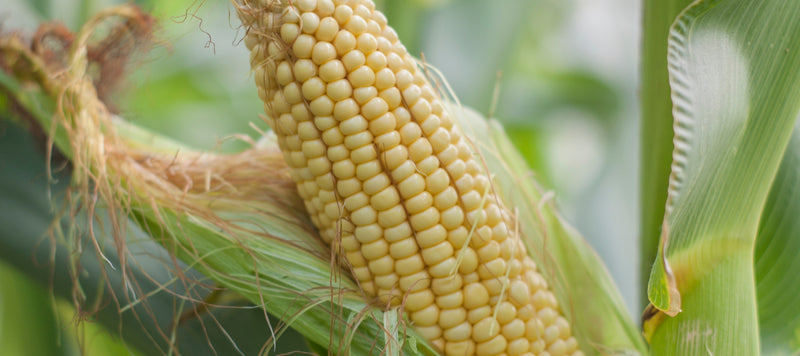
Sweet corn is the most popular type to grow and there are a myriad of kinds to choose from, either white, yellow or bicolored.
Growing Corn:
Growing corn in the PNW can be a little challenging. Although our growing season is pretty long we have cold wet springs and even during the summer, our nighttime temperatures tend to be pretty cold. Corn likes warm nights and genuinely hot weather, but we can fake it with a few tips and tricks. By choosing varieties of corn that mature between 60 and 80 days you’ll be really sure you get fresh corn from your garden in the summer.
Plant your corn seed in moist ground about 2 inches deep and about 2 weeks before your last frost. If you’ve got 60 day corn, you can plant after the first frost, get a better germination rate and still get ears before fall hits. Corn is fairly frost tolerant but may burn on the tips if you get a freezing night those last two weeks of April.
Birds love to eat germinating corn seeds so plant thickly and use netting over the row until it is three to four inches tall.
Corn is a pretty heavy feeder, so a good dose of organic fertilizer worked into the soil when planting is great, as is rich compost. Rotating crops also helps to keep your soil from becoming too depleted in one area. An ancient trick for this is to plant your peas or beans next to your corn and put the corn where the beans were the year before.
Corn needs water while it is forming ears so make sure you are watching to see when that takes place and keeping the soil moist. After it sets ears, it is remarkably drought tolerant, and you can kind of ignore it until it’s time to harvest.
Harvesting Corn:
Sweet corn is easy to harvest, you just grasp the ear and pull downwards until the stem snaps off of the stalk. For the sweetest possible ears, don’t harvest until right before dinner because the sugar in the kernels starts to turn to starch as soon as it’s picked.
Shuck your ears, kids love doing this and rinse or wipe clean to remove the silk. You can eat your corn raw, steam, roast, BBQ or boil your corn on the cob and enjoy! Fresh corn salsas made with the raw kernels are fantastic and so is warm corn cooked the way you like it best, slathered in your Garden Goddess Dressing or Garden Goddess Gremolata made from your homegrown herbs.
If you are growing popcorn, dent corn or ornamental corn varieties you’ll need to wait for the husk to turn brown and dry. If this is happening mid to late September the risk of a lot of rainy days in a row is real and you might be better off cutting your stalks down and hanging them to finish drying in a cool dry garage. All of these varieties can be stored on the cob or off, if you decide to remove them from the cob be sure they are really dry by running them through a dehydrator. After they are as dry as they are going to get, you can twist the two ends of your corn cob in opposite directions to remove the kernels. It’s best to wear gloves to get his job done as it helps you exert enough pressure and keeps your hands from getting sore. You can store your kernels in a jar or paper bag and grind or pop as needed. If you don’t have a flour mill, a small coffee grinder works great.
1 comment
Awesome advice ~ the very best concise information on growing and harvesting I have ever seen. I am looking forward to following her advice!